Attendance Activity
For staff on how to use the Attendance activity in Moodle.
The Attendance activity allows you to create graded, long-term attendance records to help maintain daily, weekly or monthly data of student attendance (complete with notes).
Add the Attendance activity
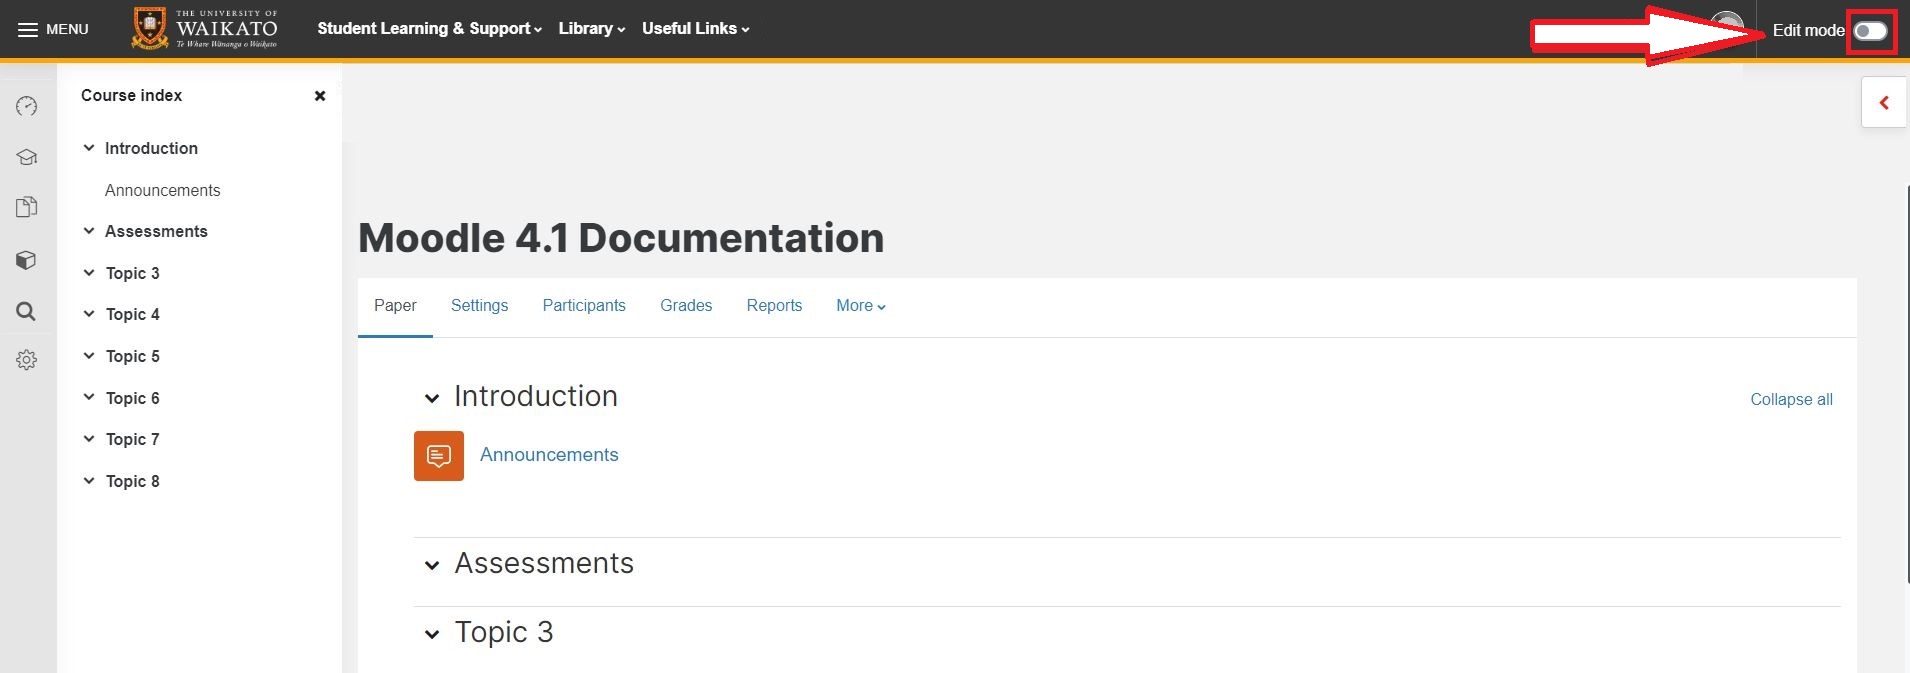
- At the top right of your Moodle paper, toggle Edit mode on.
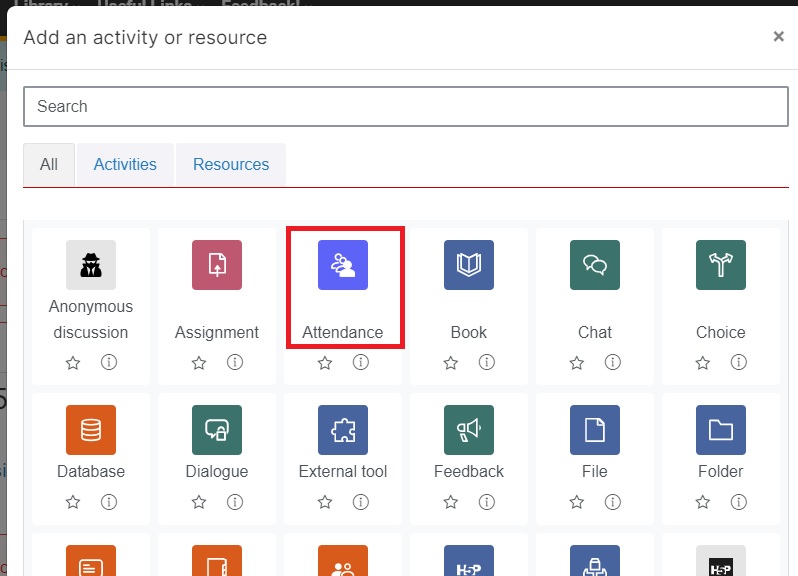
- At the bottom of the relevant section, select Add an activity or resource.

- Select Attendance.
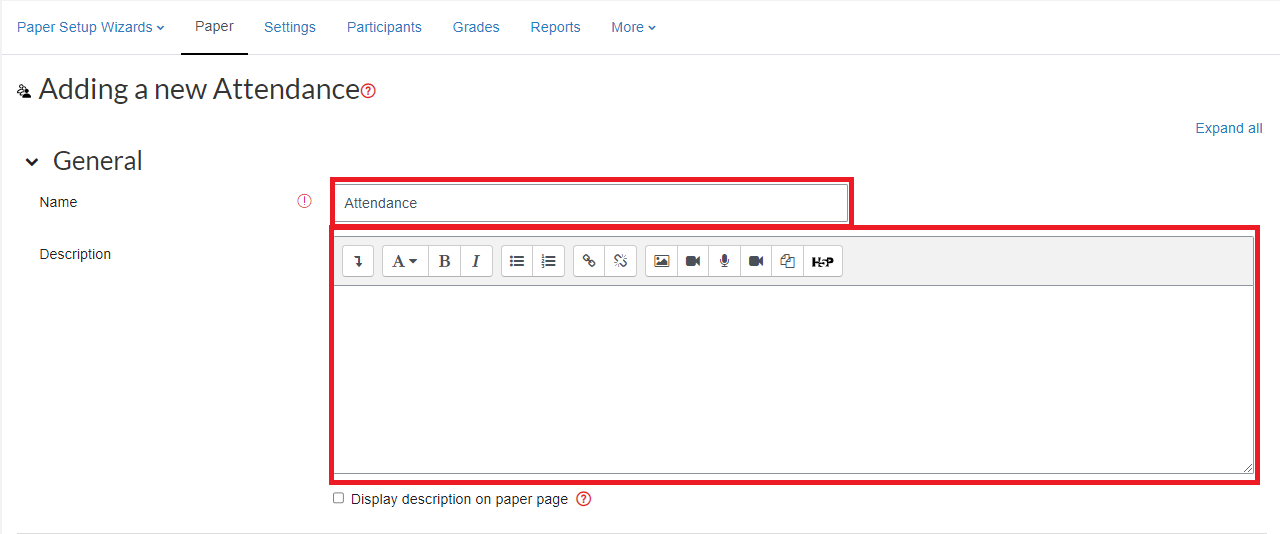
- Enter a Name for the Activity in the text box, and optionally a Description.
- To apply a grade to Attendance, select Grade, then select a grade Type. By default, the type will be Point and you will need to enter the Maximum grade.
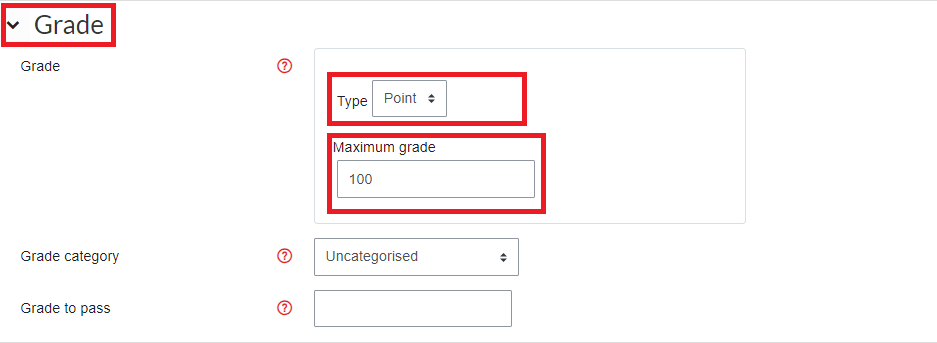
- Select the Grade category drop-down menu, then select a category.

- Scroll down and select Save and return to paper or Save and display.

Add a session
Note:
If you have selected Save and return to paper, or you are returning to your saved Attendance activity, you will need to first select the Attendance activity in your Moodle paper.
- On the left of the screen, select Add session.
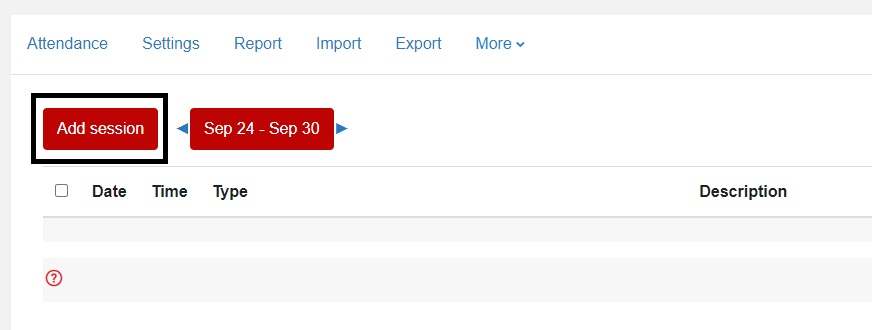
- Edit Add session settings. Type allows you to include All Students or to divide sessions into Groups, if you have set up Groups previously.

- Set the Date and Time of the session. Add an optional Description if needed.
 Note:
Note:
Create calendar event for session is selected on by default. Uncheck the box (below the Description text box) if you do not want to create a calendar event for the session(s). Unchecking the box will also delete any existing calendar events for this session. - Select Multiple sessions, then select Repeat the session above as follows, then
- Repeat on: tick the day.
- Repeat every: select how often from the drop-down menu.
- Repeat until: select the final day of attendance.
In the below example, the session is set to repeat once a week, every Friday, until October 13.
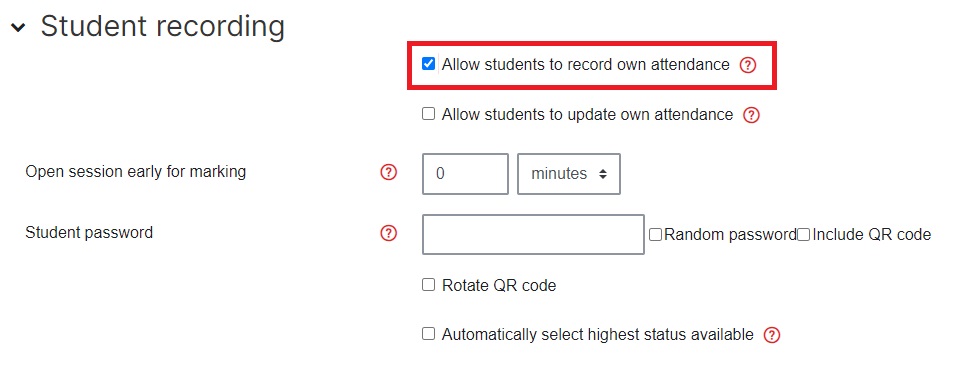
- (Optional) Under Student recording, you can select Allow students to record own attendance. If this is selected, additional optional settings will display.
- Scroll down and select Add to save.

All the sessions that you have created will now display. Use the Actions icons to the right of any session to delete or edit sessions, or to take attendance. To add another session, at the top left select Add session.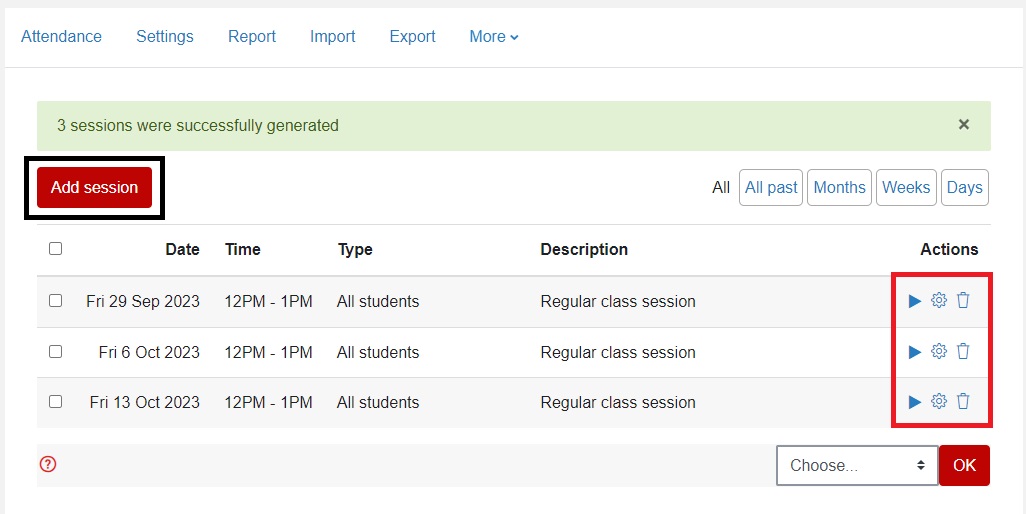 Note:
Note:
Actions provide the following functions: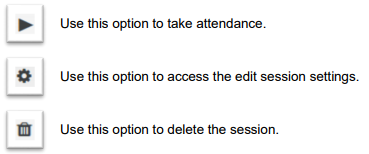
Using the Attendance activity
Take attendance
- In your Moodle paper, select the Attendance activity that you created.

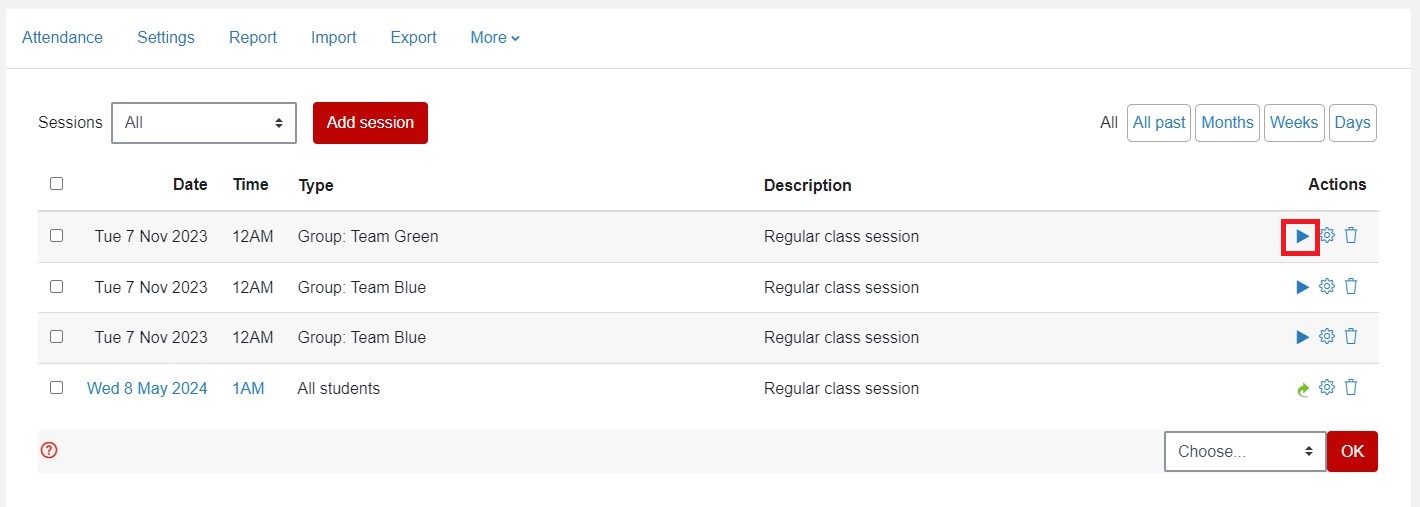
- To the right of the relevant session, under Actions, select the play (triangle) icon.
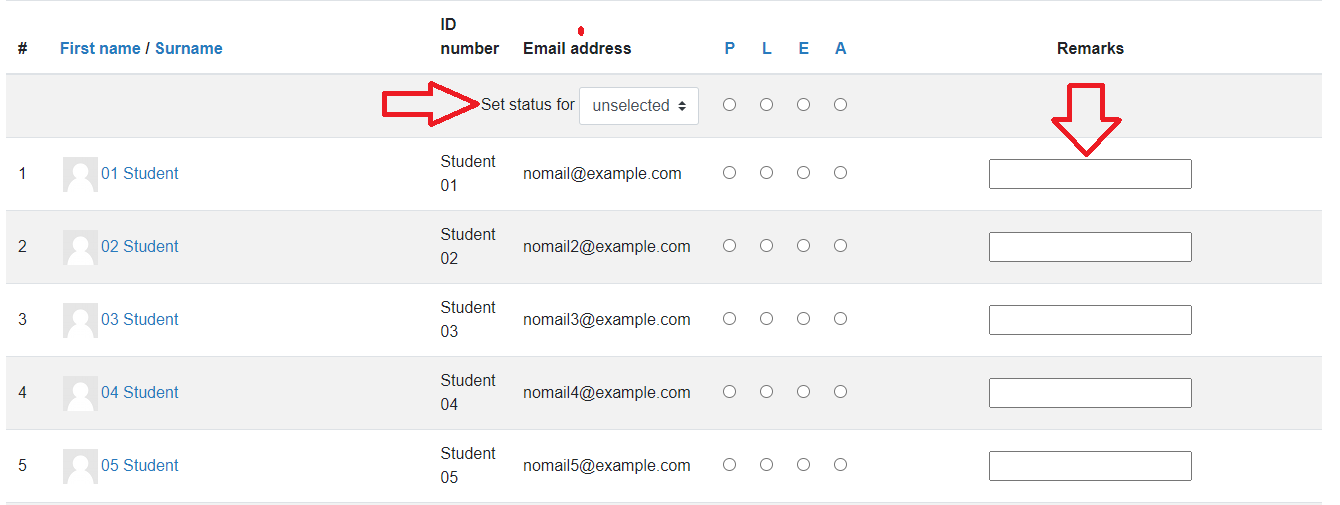
- Use the radio buttons to the right of each student to select them P (Present), L (Late), E (Excused) or A (Absent).

- To the right of each student, you have the option to enter Remarks.
 Note: To change the status of all students at once, at the top of the screen select Set status for, then in the drop-down menu select all. You then have the option to change the status of individual students by selecting P, L, E, or A as above.
- Finally, scroll down and select Save attendance or Save and show next page.

Change the attendance variables
- Select the Attendance activity that you created.

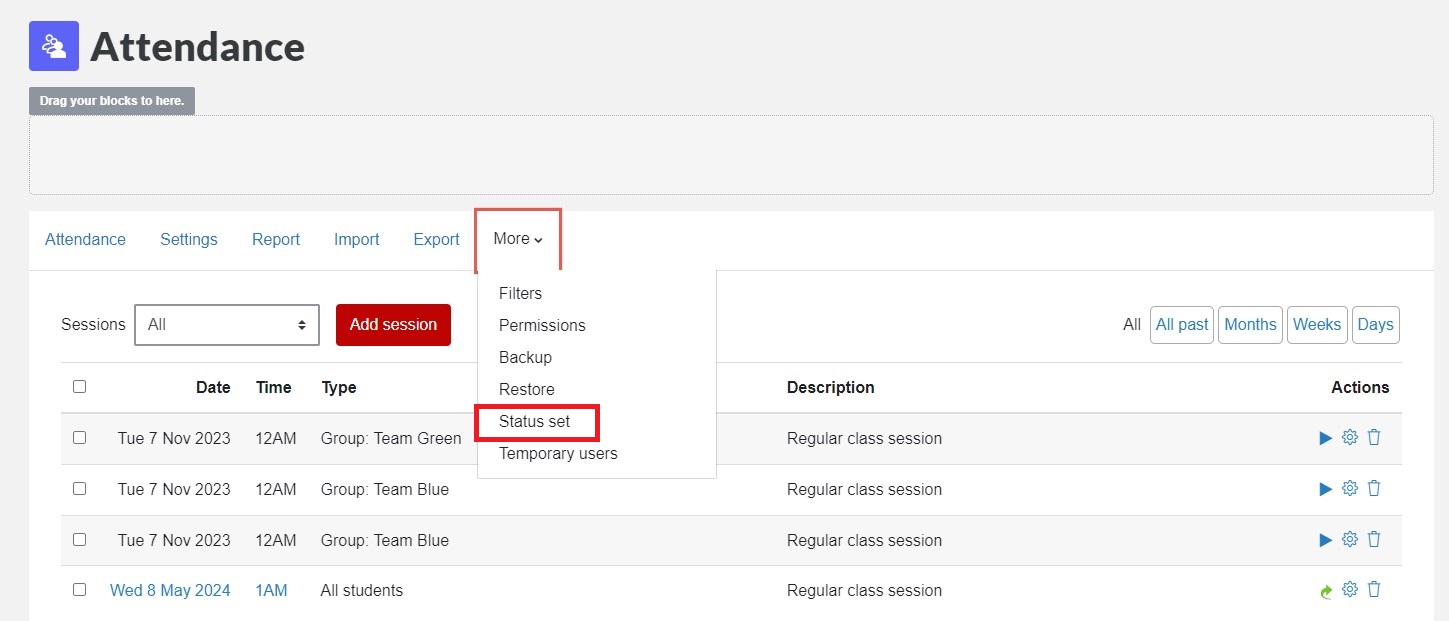
- Select the More tab.

- In the drop-down menu, select Status set.
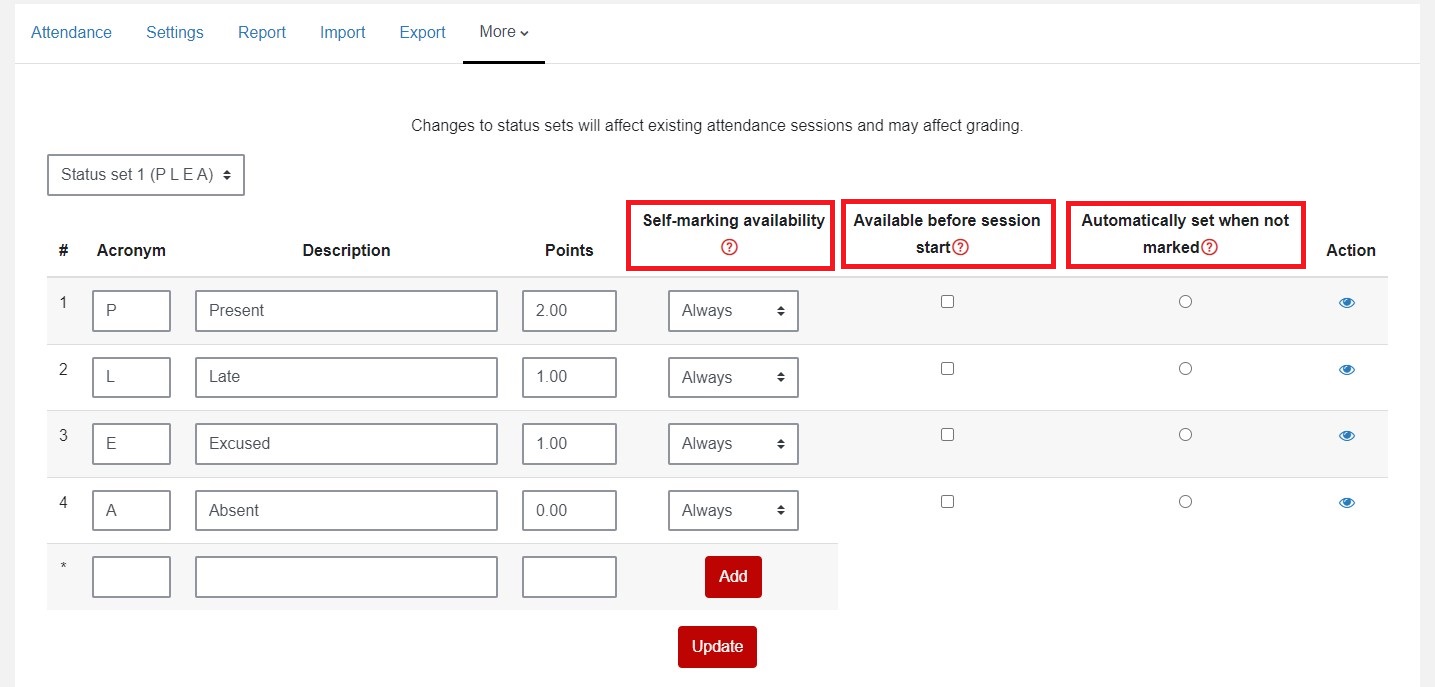
- Edit Acronym, Description, or Points for each status option using the text boxes. You can also delete and hide/show some options using the icons at the far right.
- Select Self-marking availability for each status option from the drop-down menu, then select whether to make them Available before session start, and whether to choose a status as Automatically set when not marked (i.e. when a student has not marked their own attendance).
- Finally, select Update to save.
Reports
Note: Select the Attendance activity, then select the Report tab to see an overview of the sessions.
For a more detailed breakdown, you can view reports based on other time frames by selecting from All, All past, Months, Weeks, Days, and Summary at the top right. Scroll down to the bottom of the page to see a Summary.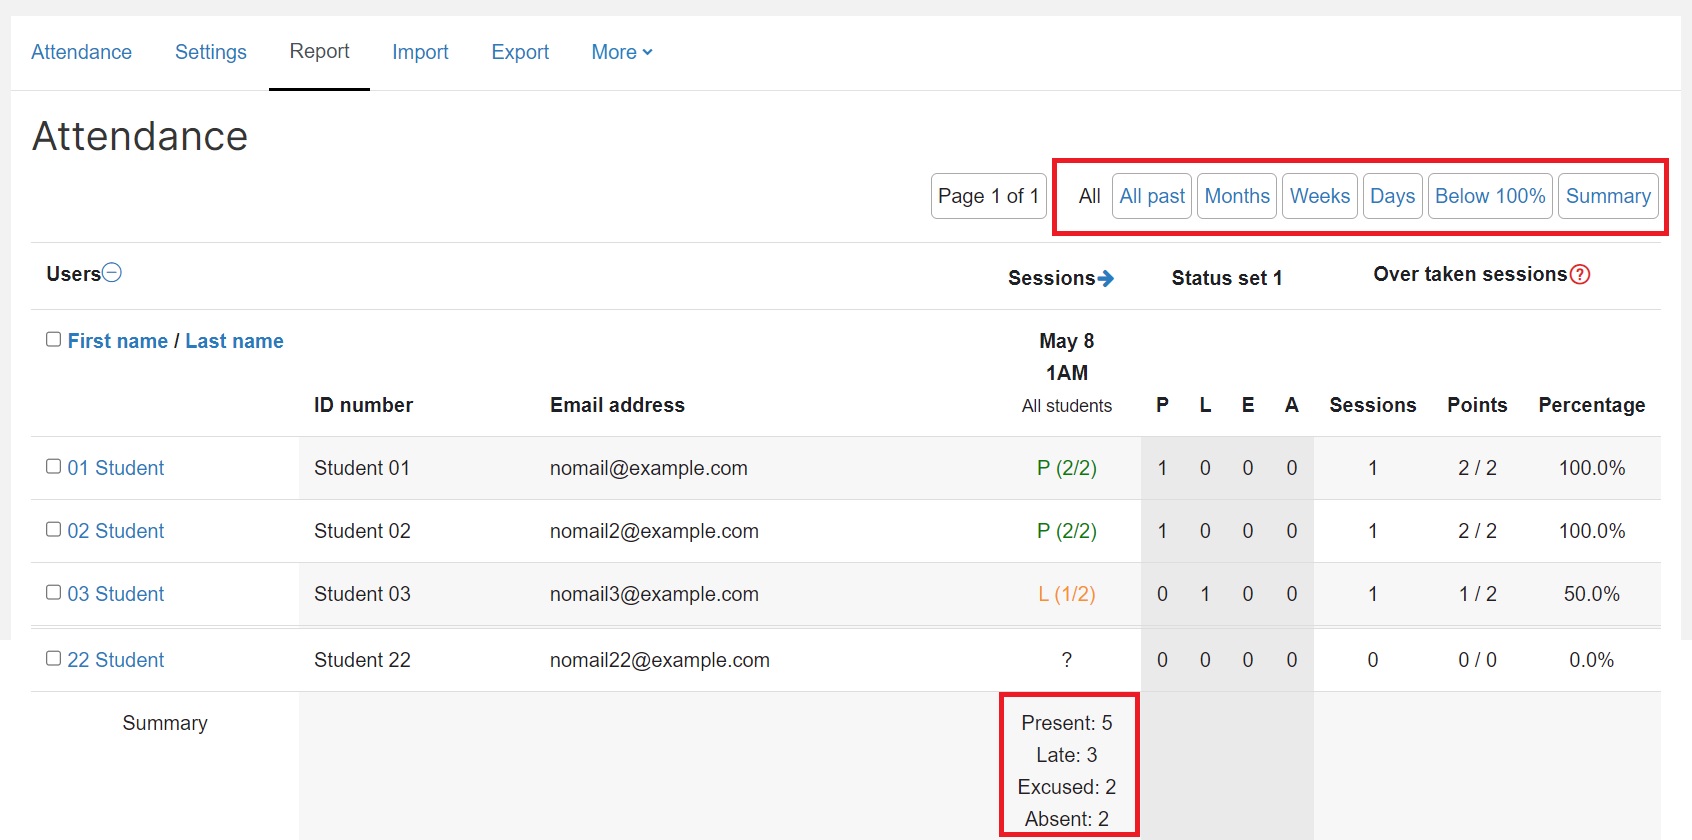
View any Remarks by hovering over the information icon 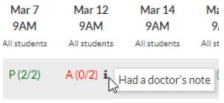
Export reports
- Go to the Attendance activity and select the Export tab.

- Select Export options:
- Group: export a specific group, or select All participants from the drop-down list.
- Select Export specific users to Yes, then select one or more Users to export from the drop-down list to export a report for a specific student.
- Use Identify student by tick boxes to customize your report.
- Tick/untick Select all sessions; Include not taken sessions; Include remarks
- Use the Start of period and End of period to indicate the date range for the report.
- Select a download Format from the drop-down list.
- Finally, select OK to export.
Reports for students
If you have allowed students access to their attendance they can select the Attendance activity, then the Report tab, to view a report of their own attendance. They can select attendance time frames.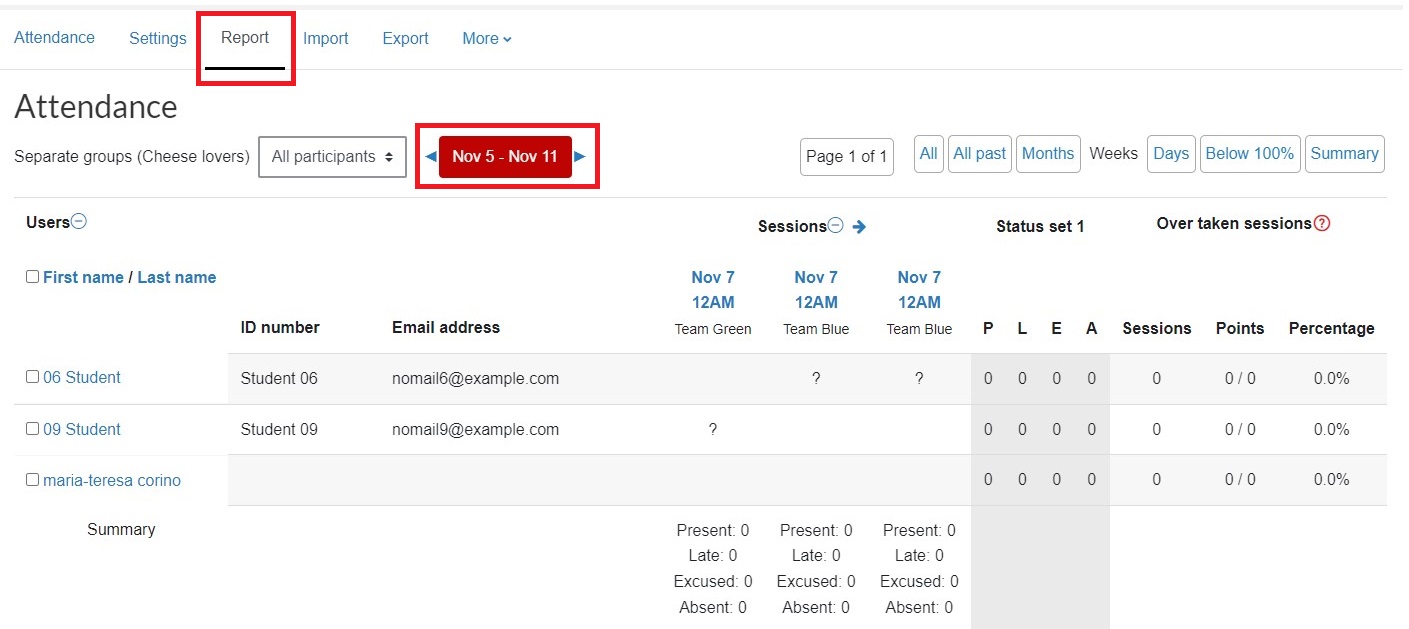
Manage temporary users
You can allow a non-editing teacher in the paper to take attendance.
- Select the Attendance activity, then select the More tab, then in the drop-down menu select Temporary users.
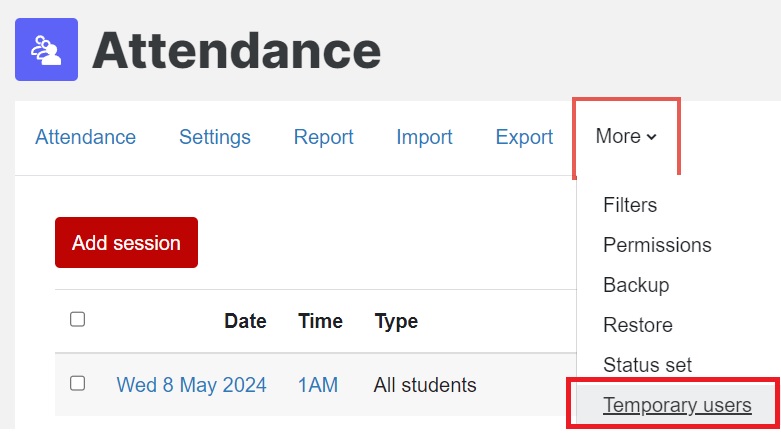
- Enter Full name, then select Add user.
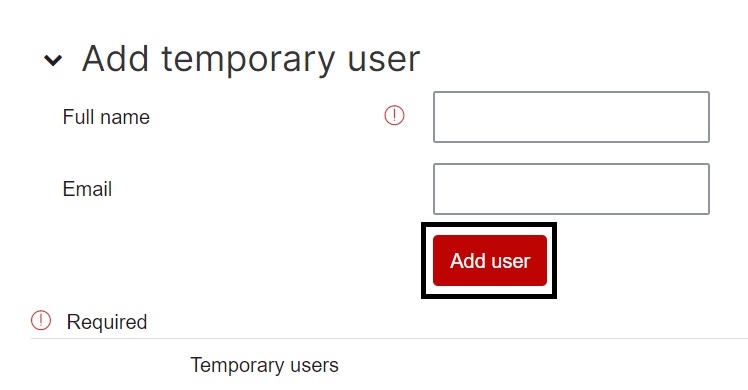
Note: The name will save even if you don't enter an email address.
